Help:Contents
Getting started is easy. Just create an account using the login/create account link at the upper right. Then send an e-mail to brted at yahoo period com to be confirmed (or send a PM to brted at either Candlepower Forums or Budget Light Forums). Once you are confirmed you will see an edit tab at the top of every page that will let you edit the page. If you see some kind of formatting you like on one page you can just edit that page and see how it was done. Here are a few of the basics, but you can see a lot more here.
Discussion Pages
Even if you don't want to edit a page, feel free to add comments, suggestions, or questions to the discussion tab of a page (you have to register and confirm for this too, since discussion pages are frequent spam targets).
- Start a topic by typing in a heading (see below).
- Respond to a comment by typing below it, starting your comment with a colon (:).
- Sign your comment by adding 4 tilde's at the end like this ~~~~, which looks like this (and gets converted to markup when you save the page): Brted 17:37, 7 December 2010 (EST)
More discussion page tips here
When editing a page, even if it is something simple, always preview the changes before saving, but always remember to save after you preview.
Headings
You can make a heading like the one above by using double equals like this: ==Headings==. To get a sub-heading, use triple equals like this: ===Subheading===. Always start with a heading and subdivide to sub-headings as needed. An outline at the beginning of the page will be created automatically based on the heading structure. You don't need to start the page with the title, it will be added in automatically.
Links and New Pages
Internal links: For a link to another page on the wiki, put double brackets around the name of a page: [[Main Page]] and it will show up as a link, like this Main Page. If you want to have the link appear with different text, use a | like this [[Main Page|Flashlight Wiki]] and it will appear like this: Flashlight Wiki. You can also link to a subsection of a page by using # in the link like this: [[Main Page#Flashlights|Flashlight sub-section]], to get this link: Flashlight sub-section.
To create a new page, just edit an existing page, insert an internal link to the name you want to give the new page, preview, and then save the page you are editing. Once the page edited is saved, you can view it and you should see a red link with the name you gave to the page. Click the red link and it will open an editing page for the new page.
Terminology links: If you are linking to items on the Terminology page, you can link to them as subsections (described above). However the terms on the terminology page are not subsections unless you add a SPAN tag. So first you have to go to the Terminology page and make sure the item has a SPAN tag identifying it (you will see others already done) like this (for the term "OP") <span id="OP">OP</span>. That sets up an anchor that you can then link to like it is a subsection. So on some page referring to that term you can make a link like this [[Terminology#OP|OP]] which will look like this OP.
External links: Use single brackets with the URL followed by a space and the text of the hyperlink: [http://www.google.com Google] to get a link that looks like Google
Images
Please restrict image size to no more than 800x600 with only rare exceptions. Before editing a page, upload the picture file first (remember the name you give the file!) using the Upload file link on the left side of the page under toolbox. If you forget the file name, you can go to Special pages and then File List under Media Reports and Uploads (should also show up under Recent Changes).
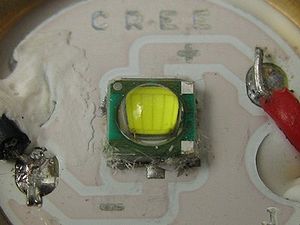
The image on the page will probably be smaller than the original image. By default you can use a thumbnail which will be about 200 pixels max. Also you will want to add a caption to the tag as well. The resulting tag might look like this (with the result shown on this page at the right->):
[[File:Creexpgr5.jpg|thumb|The caption goes here]]
If you wanted a larger version of the image than the default thumbnail, you can specify the width of the image. The tag below will generate a 300 pixel image (you still want to use "thumb" so that it will be in a border with a link to the full-size image). This tag also aligns the image on the left instead of the default right side (<-image appears to the left):
[[File:Creexpgr5.jpg|thumb|300px|left|The caption goes here]]
Footnotes
To make a footnote, include the text of the footnote where the the little number is supposed to go and in between <ref></ref> tags. So I will put a sample footnote at the end of this sentence that I would type in as <ref>Sample footnote</ref>.<ref>Sample footnote</ref> Now for the footnote to show up at the bottom of the page, I have to put another tag by itself that looks like this <references/>. So I'll put that down at the bottom of the page, but I'll also add a section heading called References.
There is a more complex way of referencing web pages and forum posts that uses the Cite Web template. Find the template here, copy and paste the format to the article, and fill in as much of the information as you can (delete what you don't need). The footnote will be formatted correctly.
References
<references/>
